Group Management
Groups allow you to organize users into functional teams (e.g., "QA Team", "Auditors") to streamline permission management and workflow assignments. By assigning roles or tasks to a group, you ensure consistent access control across entire departments.
1. Group Directory
Navigate to Company Settings > Groups. This dashboard provides a card-based view of all active teams, displaying key metrics like member count and administrative leads.
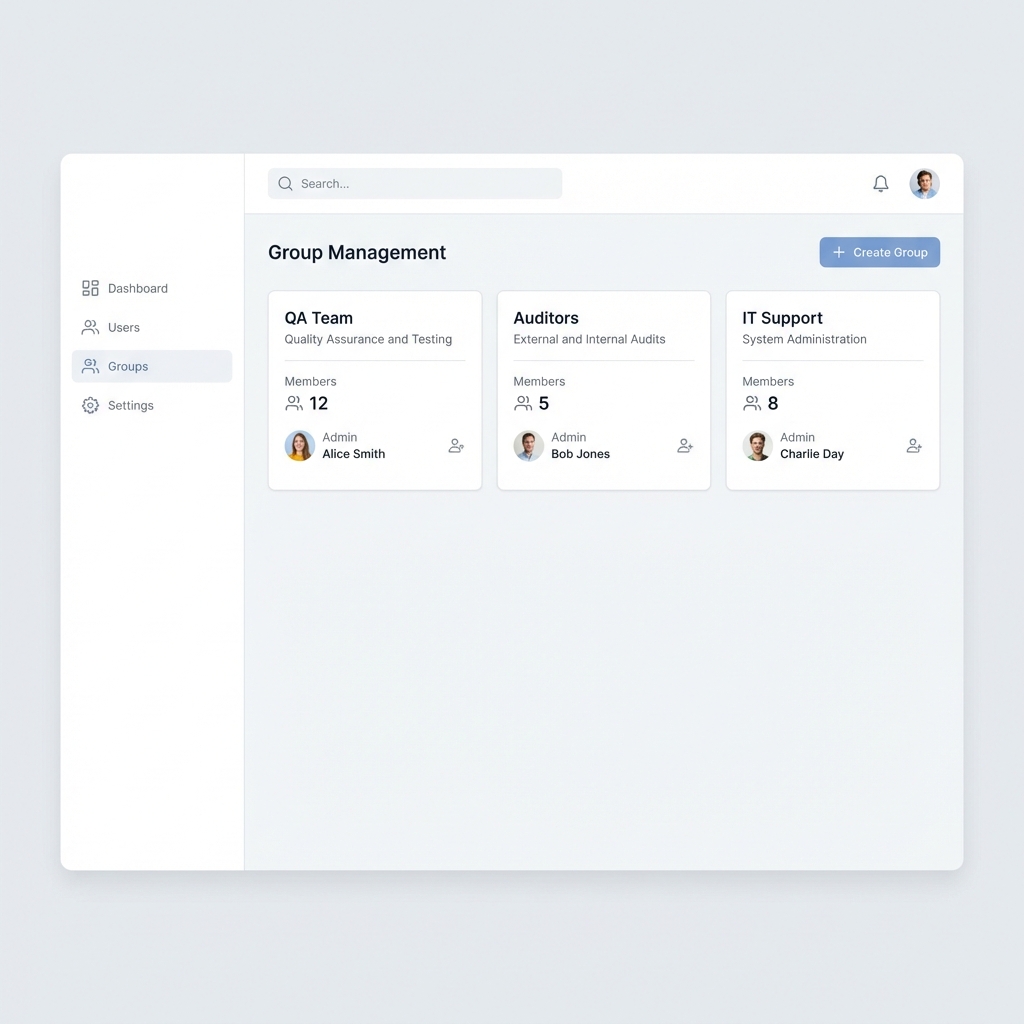
Card Overview
Each group card provides a snapshot of the team's composition:
- Group Name: Distinct identifier (e.g., "Test Group").
- Description: Brief scope of the group's responsibility.
- Administrators: Users with permission to manage this specific group's settings.
- Members: Regular users assigned to this group.
- Quick Actions: Note the View Group button at the bottom for detailed management.
2. Creating a New Group
To establish a new functional team, click the + Create Group button on the top right.
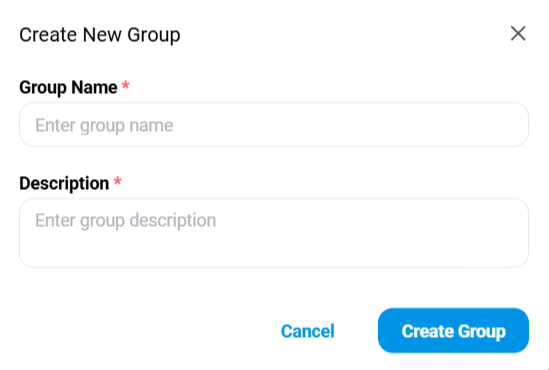
Configuration Steps
- Group Name: Enter a unique, descriptive name. This will appear in dropdowns throughout the system.
- Description: Define the purpose of this group. This helps other admins understand the context before assigning sensitive permissions.
- Confirm: Click "Create Group" to initialize the team.
3. Managing Group Details
Once created, clicking on a group card opens the detailed management view. Here you can forcefully add or remove users.
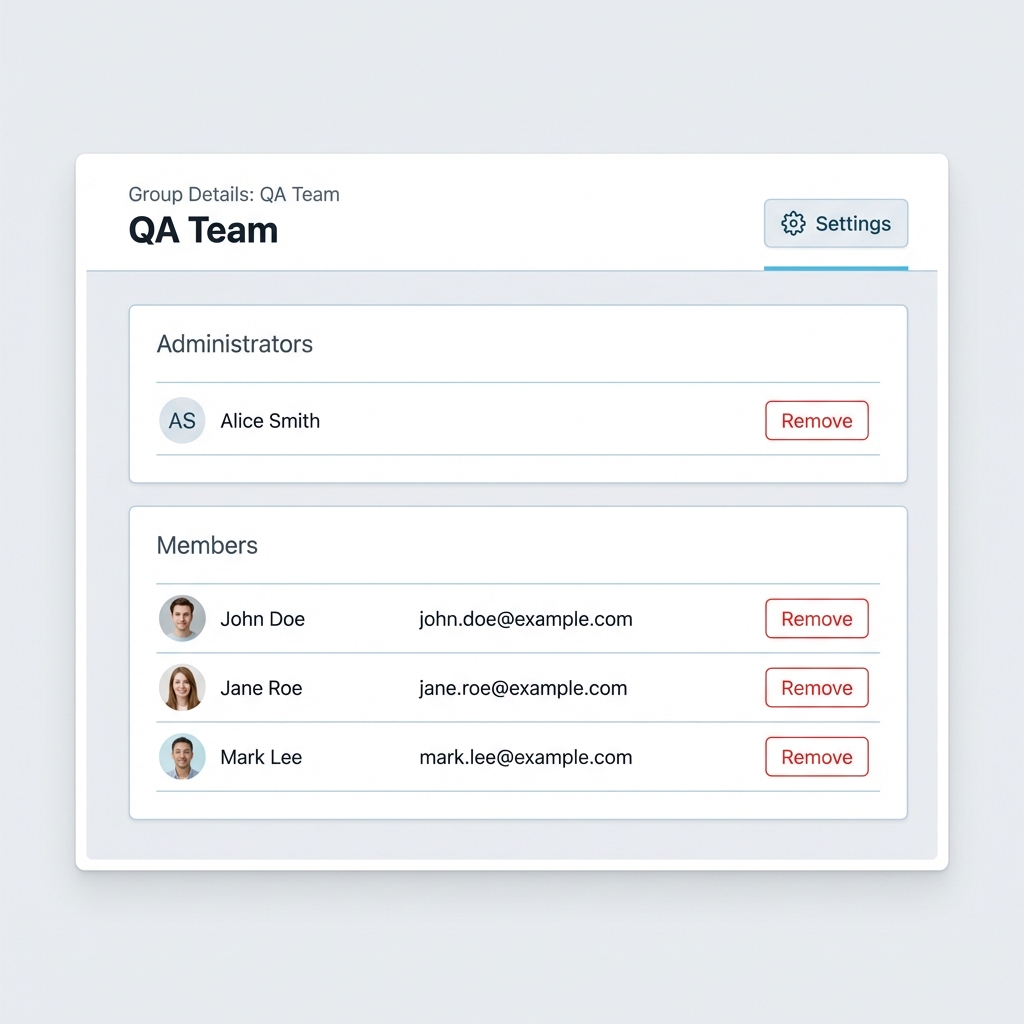
Roles within a Group
- Administrators: Start typing to search for a user. Assigning someone as a Group Admin gives them power to add/remove others from this specific group without needing full Company Admin privileges.
- Members: Add the bulk of your team here. These users inherit any permissions or workflow tasks assigned to the group.
Use Cases
- Notification Routing: Configure system alerts to notify the "IT Support" group instead of a single person.
- Workflow Assignment: Assign a PSUR review task to the "Clinical Reviewers" group; any member can then pick up the task.